er...I cut the rusty Swiss cheese metal out of the core.
 Tacked in some new steel.
 Burnt it in. Did the same on both sides.
 Made some patches for the attachment sites.
 Burnt them in as well.
 This one looks better.
 Tacked in some new steel.Burnt it in. Did the same on both sides.Made some patches for the attachment sites.Burnt them in as well.
 The first thing to go was this center grille support.
 This is the 2nd gen intercooler. You can see The Great Vittorio in the background.
 I forgot to tale some pictures, apparently. Maybe I will edit them in later. The next thing I hacked out of the core was a section of the box at the bottom so I could drop the intercooler as low as possible. This would take out some serious structure from this part that supports the hood, fenders, radiator, battery, etc, but I will combat that by grafting a piece of 1.5 inch box tubing along the bottom. By doing this, I will not need to use the body lift spacers under the core and it will be every bit as strong as original.
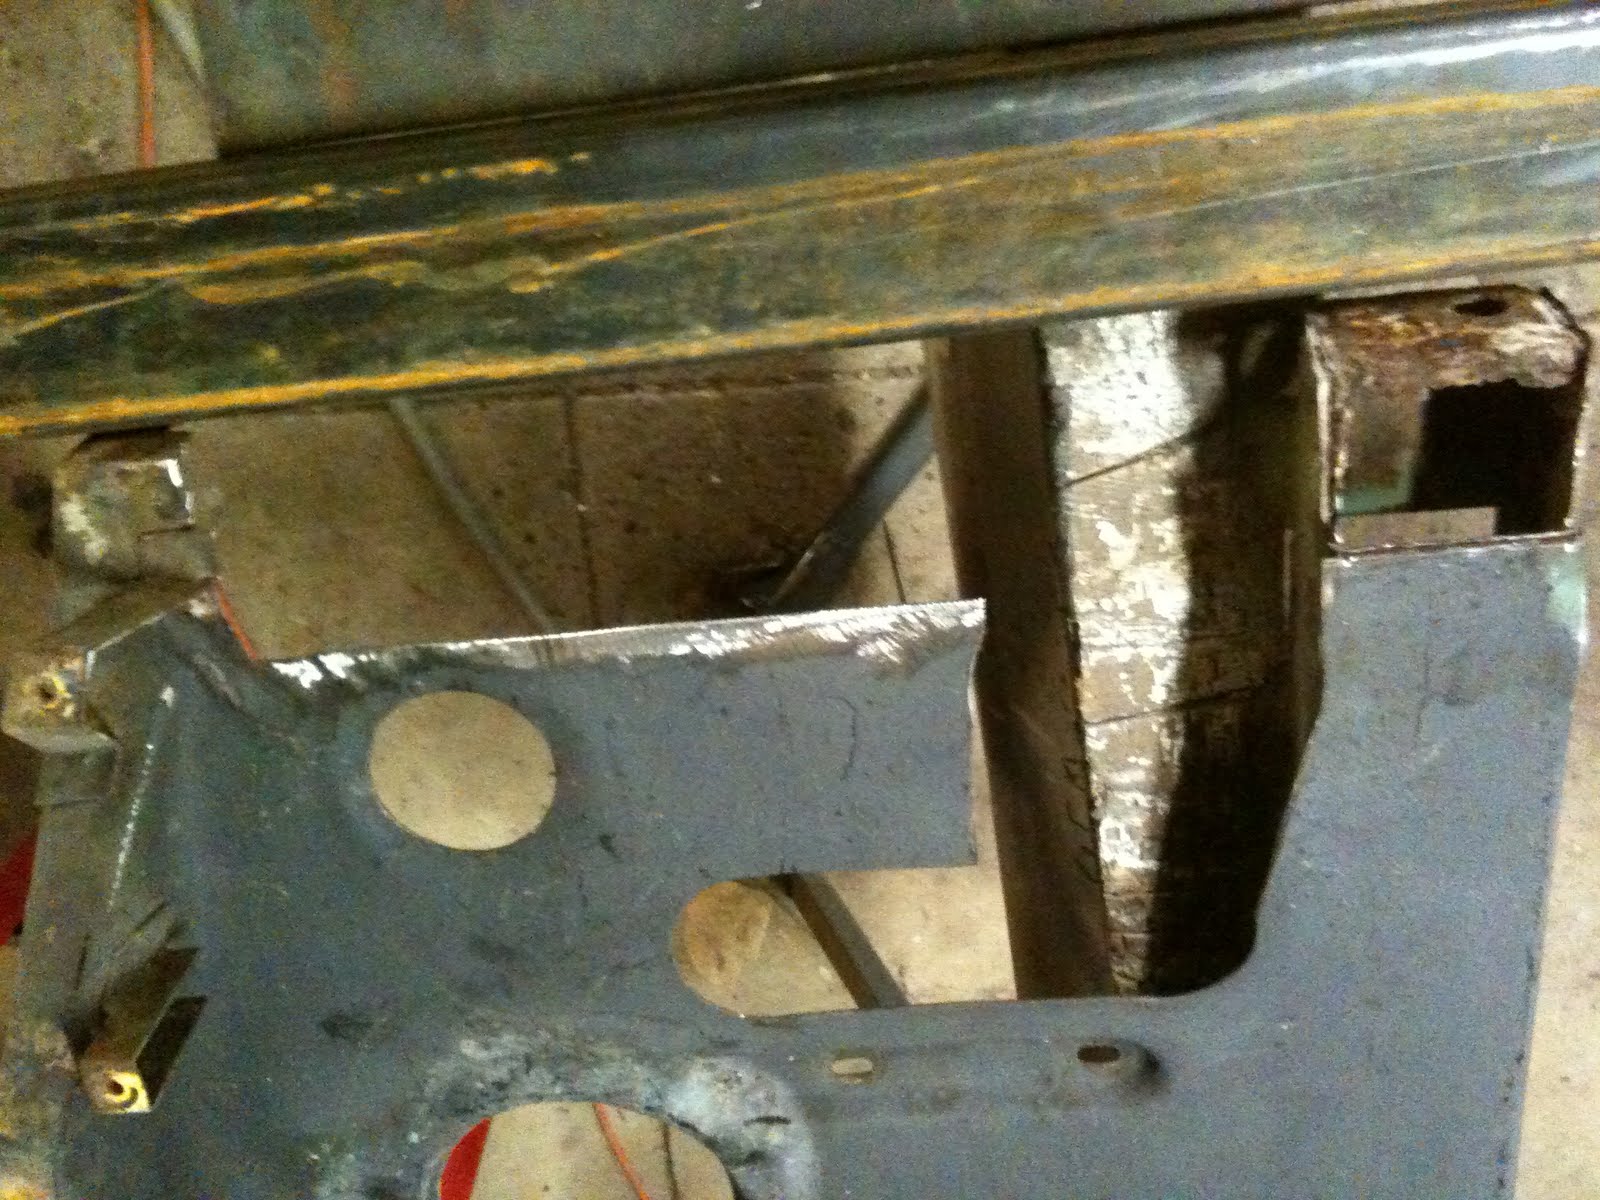
 The next thing to tackle is the condenser. On a 1st gen Dodge Cummins truck, the condenser is on the outside of the intercooler. There is now way this would fit behind this old school grille. My solution is to put the condenser between the radiator and the intercooler. I am hoping this will work. I do not know how much the intercooler will preheat the air before it reaches the condenser, but I will give it a try. To do this, the center support down the middle of the core support needed to go. In the picture below, you can see that I also cut out some of the metal below the condenser. I actually did not need to do this. I only needed to square the lower corners where they were rounded like the upper corners or the hole, as you can see in the pic. Since this core was all swiss-cheesey with rust that needs to be patched anyway, I just hacked it out of the way for now with a sawzall.
 This shot shows the missing center support. In the upper left corner, you can see where I marked for the hole for the connection point for the air conditioning hoses.
 So, now I have the condenser in, the intercooler in, the grille on, and the lower valance in place, well, almost.
 I'll try ti set this picture up. The silver on the right is the bottom lip of the grille. The little smile at the very top of the pic is the right turn signal lens hole. And, the long hole in the middle is the original hole in the 1975/76 valance. In the hole you can see the edge of the cooler. This is the part that is holding the valance out. The black lines are showing my plans for more chopping. In the pic, you can't see the contour of the metal, but if I cut this out, the valance will drop back at least an inch.

 Here, with the radiator out, you can see the connection block for the condenser.
 This shot is looking down the hood latch opening. Red arrow = intercooler. Blue arrow = condenser. Yellow arrow = Radiator.
 And, here it is all dressed for the party. I was so excited I even got out the ladder so I could get far enough away to get the hole thing in the picture.
 Not so dramatic in the picks, but I punched some holes and used a slide hammer with a little tapping with a body hammer and pulled it out close enough to skim it with filler and make it go away.
 This dent is under the front passenger door. I treated it the same as the other dent and got it pretty close as well. Forgot to pic the end result.
 Another shot from below.
 A shot of the sill.
 This is what the seam looks like. It will look just like the factory seam.
 This shot from down in the hole by the seat back shows the holes I made for the rosette welds. I got it welded-up today, but did not take final pictures. oops
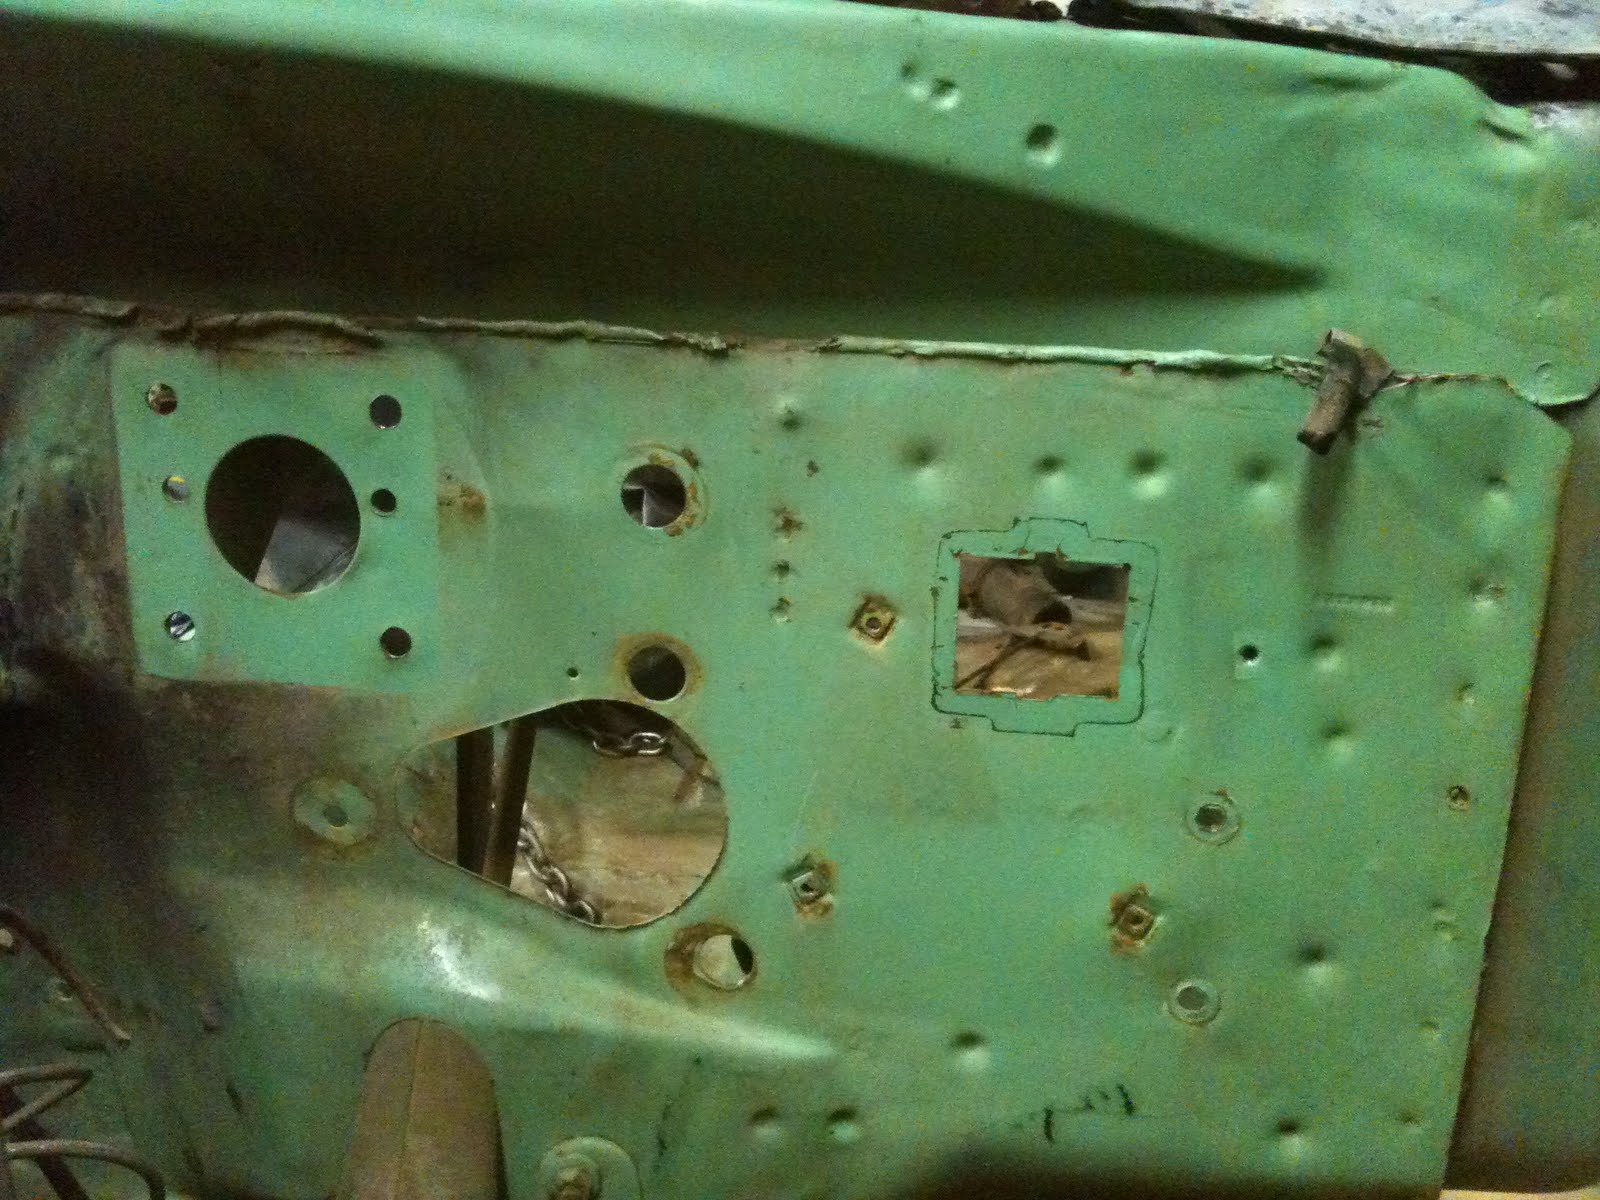 Luckily, a friend had saved a piece of the firewall from a truck he scrapped. This is a close-up of the clutch cylinder hole and the bulkhead connector hole.
 Lining up the brake booster hole and steering column hole I can locate where the hole needs to be. I can also see how the bulkhead connector hole needs to be shifted.
 I should be able to cut the right side out of the rectangle hole and weld it into the left side. Then, I can use the appropriate hole saw to pop out the clutch hydraulics hole.

 Next, I went a-harvesting in my 1989 ram-garden. Before anybody wails about hacking-up a clean cab, this is the cab I cut the firewall out of for the ramcharger. It may need to give up its floor for said ramcharger as well.
 Here is the "new" steel. This is straight and rust free.
 This is a pic of the plate down in the hole. Looks like in 1989 they used even more gobs of goo-gob magic seam putty.
 After an hour of drilling more danged spot welds and blasting my eardrums with the air chisel, I got the donor panel almost ready. Her it is sorta stuck up in place. Maybe I get it welded in tomorrow.
 This is a really clean cab and this is by far the biggest blemish.
 It looks like it is just a good bashing and no rust.
 So, I started the arduous task of drilling out spot welds.
 If I can get this panel off clean, I can fix the small crease that is forward of the seam.
 This plate was held in place with copious amounts of factory putty-goo. It was down in the hole in the bottom cab corner behind the rear seat seat-belt.
 This is a picture down in the hole where the plate came out. More blasted spot welds.
 You are right, this is not my crew cab. Once again, the Cummins Ramcharger is taking time, energy and money away from completing the crew. Not long ago, I replaced the raggedy old worn-out Dana 44 with a Dana 60. I can't remember if I updated the rc blog with that, but, long story-short, the 44 had 4:10gears as did the rear axle. The 60 had 3:54 gears which I worried would be too tall for the 37" tires I am now running on it. I was planning on replacing the Ramcharger's rear axle, also a Dana 60, with a Dana 70 with 3:54s from one of my donor trucks, but the taller gear ratio kept nagging at me. So, instead, I bought a Dana 60 carrier with 4:10 ring and pinion and decided to have M&H machine install them for me. To save a little money and not have my truck tie up their shop, I stripped the axle and pulled it out completely and just took them the housing. When I get it back, I will have 4:10s front and back.
 Back to the crew... Here is one of the spacers on top of the new isolator at the front right cab mount.
 Crappy pic of the right rear cab mount.
 Mission accomplished, The cab now just clears the fuel tank by a little under 1/2". The floor clears the bell housing, tranny,and transfer case. All is good and the price was right.
 Here they are, side-by-side.