How to Read this Blog

When I started this blog, I could not figure out, within the given parameters, how to get it to read logically. So it ended up with the freshest post on the top of the page with the top of the post being the beginning of the post. When you get to the end of the post, you will find the beginning of the previous post. A bit awkward, but ...it is what it is. (right David?)

Also, feel free to leave comments. I engaged the annoying "real person verification thingy" because some dork put an add to his product on my blog and disguised it as a comment. He probably works on wall street.

Saturday, March 28, 2009

Please forgive me.

If you go back to the original post on this blog, you will see the truck with the Super Bee decal and stripe. When I originally built this truck with the 440, I tried to stick with a 1969 Super Bee theme. The color was a correct Mopar color for the Coronet Super Bee. The gas caps were from the muscle car era. And the stripe is the classic Super Bee touch. At that time, I painted the Dodge v-8 blue 440 to a nice Hemi orange. For over a decade, we have simply called this truck the "Super Bee." So holding to the tradition, I nixed the Dodge Cummins Black and the Cummins correct baby poop tan colors and went with the Hemi orange.
Her is the engin with frash paint. I ran out of orange before I got to the oil pan.
I love the way the contrasting colors make the orange pop. I went with black on the oil pan. The chances of having this engine leak proof are slim so I thought black would be fine for the pan.
Right side.
Right again.
Top.
Yep.


More engine teardown.

Cleaning-up the engine and getting ready for paint, I wanted to remove as much as possible that was easy. I like the way an engine looks when the base (block) is freshly painted and the accessories stand in contrast to the base color.

To get to the top inside nut on the power steering pump, I had to modify a 15 mm wrench. Luckily, in my toolbox I was able to find a cheap loner wrench. A few seconds with the torch, and I was able to get right back to work. (unfortunately, I left the acetelene bottle on and now it is empty. Doh!)
My custom wrench.
In taking the fan off, I did a little experiment to see how thick my skin is. Poor little guy.

Dowel pin tab.

I ground this tab out of a large washer.

After using a sharp chisel ti open up the space between the bolt and the pin, I inserted the tab. Then I removed, cleaned, and retorqued the timing case to block bolts using locktite.

Friday, March 20, 2009

Timing cover removal.

Today I finally got back into the shop for an hour. I had been laid up with the flu for a few days, but now I have a week off. Other than a trip to Seattle, dropping a few trees, helping my son with his science project, and nursing my back, I have nothing to else to do.

I started by removing the dampner. The unmistakable smell of locktite, not to mention the hernia in my gut, tells me these bolts were put in to stay. (note to self: Get the four dampner bolts off the head and into a labeled bag, Dummy.)
Having removed a cummins timing cover before, I knew there were different length bolts holding it on. Some go through the cover and case and into the block (long). Others just hold the cover to the case (short).

To avoid confussion upon reassembly, I made a map of the cover. At the bottom I traced each size bolt and labeled the long bolts "1" and the short "2." I also indicated any "special" doodads different bolts, such as on extended "1" and one extended "2" that hold the factory tach pick-up.
The first thing I checked upon removing the timing cover was the infamous killer-dowel-pin (KDP). This dowel is used by the factory to aid assenbly. Other than that its only purpose is to, perhaps, strengthen the block to case attachment. The dowel pin won its name, Killer, and its infamy from its habit of backing out of its home and taking a ride through the timing gears. Personally, I make a habit of "killing" the KDP anytime I have the timing case open or if I even have easy access, such as if the rediator is out. The KDP can be killed by either peening the aluminum case around the dowel pin hole with a punch or by fabbing a tab to cover the hole. The tab can be held in place by the case attachment bolt immediately to the right of the pin.
I am getting tired of my crappy camera, but I don't dare take the wife's camera out into the grease. Anyway, this is my before image. I was hoping you would be able to see that the end of the pin was on the same plane as the shoulder of the neighboring case bolt.
After tapping on the pin with a punch, it went in about 3/16 of an inch. It is generally assumed that the dowel pin is bottomed out upon assembly. I do not know if this is the case, but if it is, mine was on its way out. Not knowing how many miles were on this engine, I have no way of knowing how much time before...Boom. My guess issomewhere around a million more miles. If its only gone 3/16 inch in most likely 2-300,000 miles, it was not in a hurry.
Another note: The last pin I killed, on my ramcharger project, some of the case bolts were loose. I mean, not even finger tight. One of these coming out will do as much damage as the dowel pin. It is also standard procedure to clean the bolts and holes and retorque them with locktite. The crank needs to be rotated to expose hidden bolts behind gears.
I an not sure but it looks like the outer lip on the cover seal was wearing too close to the end of the crank. It was clearly leaking. When I replace the seal, I will set it a little deeper in the cover.
A point of curriousity: When rotated, the timing mark "0" on the lower gear will line up with the "E" mark on the upper gear. I will head over to http://www.dieseltruckresource.com/dev/forumdisplay.php?f=93 to see if this is staight up or if it is a tooth off as I expect.
EDIT: my research shows that I am timed correctly.
A pic of the gears waiting for me to get back at it.

Friday, March 13, 2009

Nekkid Engine

Started stripping the engine to clean it up for painting.For some reason the oil pan and timing cover are Cummins beige. I wish I knew the history on this thing.

Somebodies mod on the throttle linkeage

A reman tag on the injection pump.
I always thought that you rotated the pump toward the head to advance the timing. According to these marks, it looks like the timing is actually retarded.
There is about 3/4 inch between the top of the pump and the head.
Another mystery. The info plate is missing from the side of the timing case.

Thursday, March 12, 2009

Engine on the stand.

Dang, in this shot you can see what an armpit my shop is in. With only a few minutes in the shop today, my focus was to get the engine on the stand. This stand is extreemly high. The valve covers are about eye level which is cool because I will be able to clean it up and work on it without havien to stoop over. My back will not take any of that nonsense.Left side.
The 1100 pounds cantelevering on those bolts scares me so I added a couple of c-clamps to ease my mind.
Another piece of security. This junk is HEAVY.

Wednesday, March 11, 2009

Wow, middle of June to middle of March. Seriously, where have I been.

Last summer I took time off from this project to work on my Cummins Ramcharger project. After getting that on the road, I played with it all summer, including entering it in three sled pull competition, with the best performance taking sixth place out of twenty-some trucks at Banks, Oregon.

Anyway, I am back to work on the crew some more. Today, I lifted the engine off the floor with the idea of setting it on the engine stand. I got as far as removing the bell housing, clutch, flywheel, and adapter plate. I did all this only to find that I did not have any metric bolts the right size to attach the block to the stand. Hopefully I can get a trip in to the parts store on my way home from work tomorrow.

When I pulled the engine out of the doner frame, I first disconnected the NV4500 5-speed from the bell housing. I left the bell housing and clutch intact on the block.


Since the engine was sitting on blocks on the floor, and one of the blocks was under the bell, I lifted the engine with the cherry picker.


A shot of the inside of the bell housing with the clutch fork and throw-out bearing set in place.


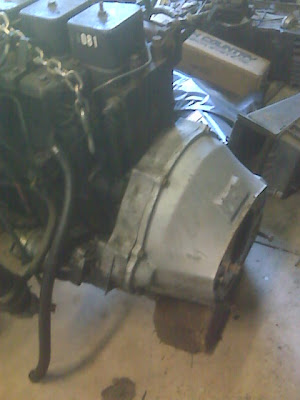
A shot of the pressure plate on the back of the engine.


A peek at the fingers on the pressure plate.


"LUK" is stamped into the pressure plate. I mainly want to post this and some of the following pics so I can link to them when I ask some qustions over at dieseltruckresource.com and or ramchargercentral.com.


12 1/4 inches.


Not dead, but not enough to put back on. Looks like I am buying a new clutch.


More numbers. These are on the flywheel.


Inside of the pressure plate.


Flywheel on the floor.


Flywheel number.


Flywheel number.


More flywheel info.


Here is a shot of the adapter plate that attaches the 1993 engine to the NV4500 that did not come out in the dodges until 1994.


A bit blurry shot of the end of the crank and the back of the block. Finally a mounting surface for the engine stand.


I may regret it later, but I left the starter on the adapter plate. I di not have a metrick 12 point socket to remove the starter bolts. Sniff. I smell tool purchase in the near future.