How to Read this Blog

When I started this blog, I could not figure out, within the given parameters, how to get it to read logically. So it ended up with the freshest post on the top of the page with the top of the post being the beginning of the post. When you get to the end of the post, you will find the beginning of the previous post. A bit awkward, but ...it is what it is. (right David?)

Also, feel free to leave comments. I engaged the annoying "real person verification thingy" because some dork put an add to his product on my blog and disguised it as a comment. He probably works on wall street.

Tuesday, November 22, 2011

Still exhausting

Still punning. The "' Stan's kit is now permanently in place. Somewhere along the line I swapped the turbo exhaust housing to a 16 cm housing. This should help spooling compared to the notoriously laggy factory housing.
On these trucks, with the right hand drop on the transfer case there is not a lot of room for a fat exhaust pipe. Here are some clearance issues. The transfer case.
The cross-member.
The front drive shaft.
For the frontmost hanger, I made a stepped bolt and used a shock absorber bushing in a factory bracket at the bell housing.
This is a hanger at a little cross member at the back of the cab.
This is at the cross member that goes over the fuel tank between the front hangers of the rear springs.
Another pic.
I wanted to make sure a spare would fit, so I stuck one in the frame.
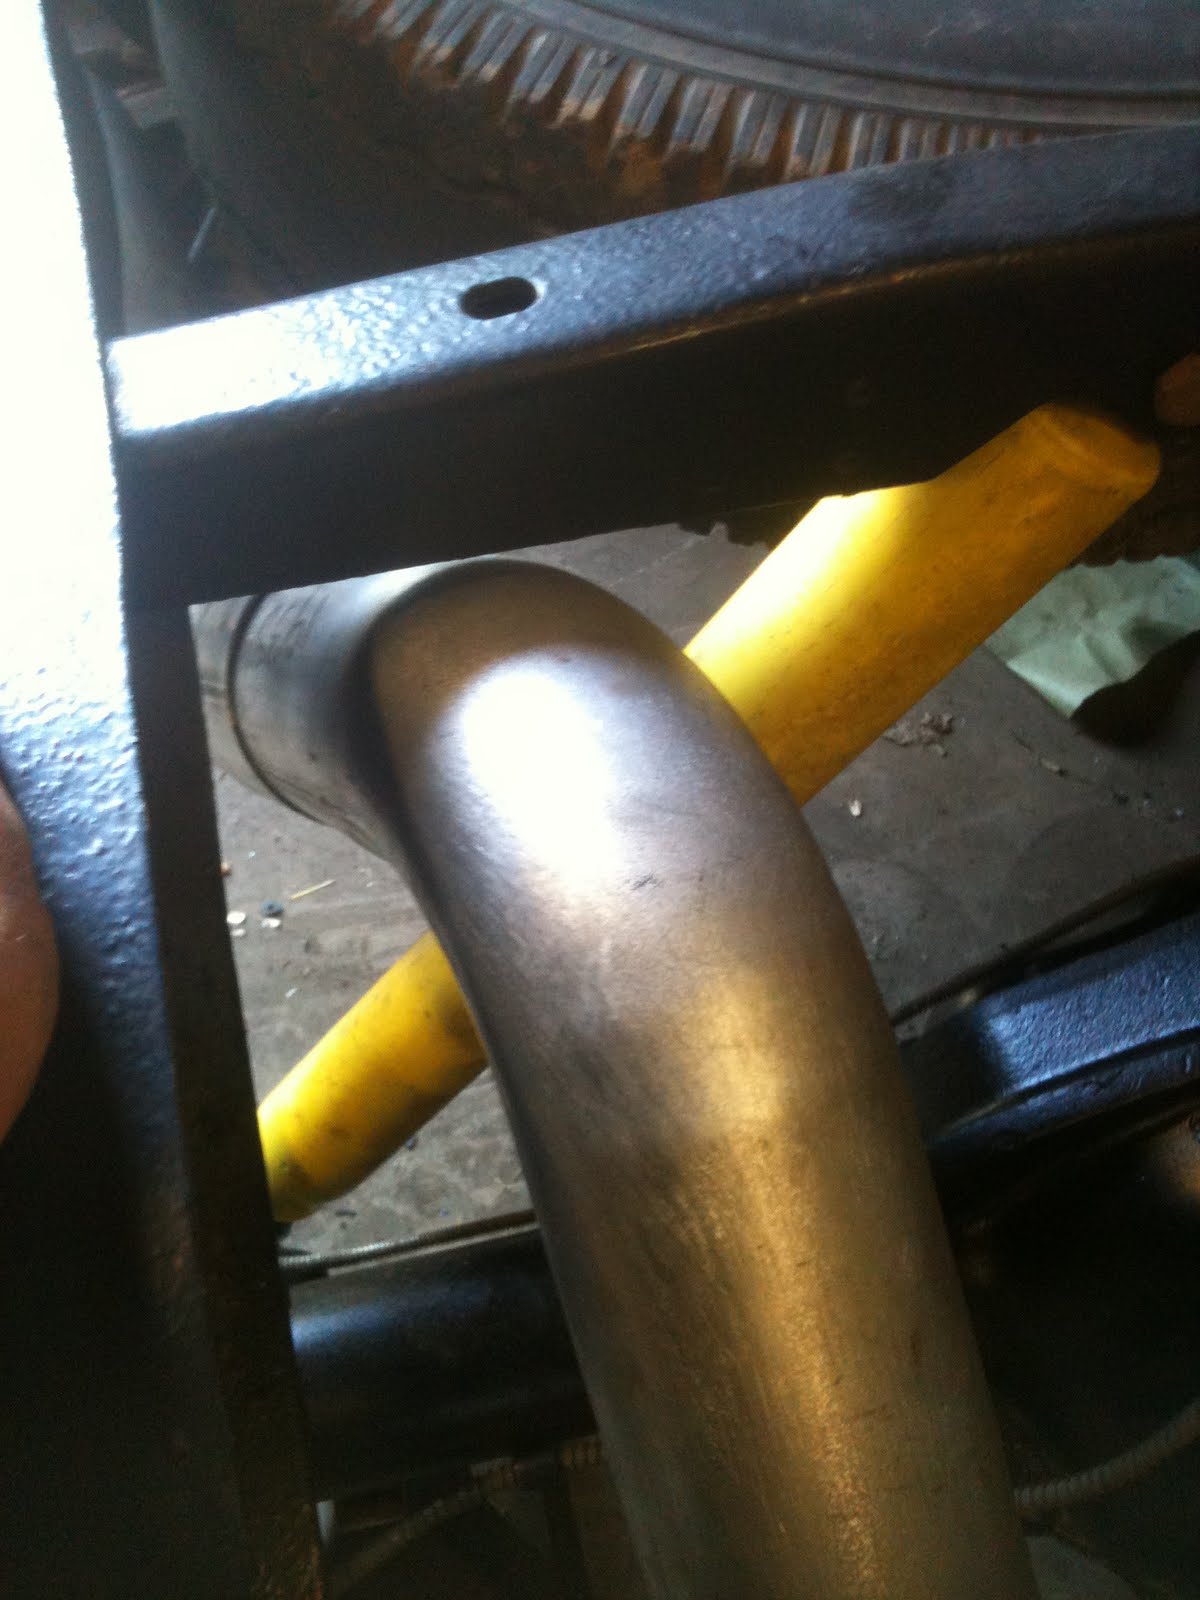
All fits well. Since the kit was made for an extended cab long bed in which the frame is 6 inches longer behind the rear hangers, I will need to cut 6 inches out of the tail pipe. I will wait until I get the bed on for this, though.

For now it just looks a little goofy.


This is becoming exhausting.

Sorry about the pun. I have been concerned about the tight clearance between the 4" Stan's exhaust and the cross-member brace at the transfer case. I am sure the Stan's would have fit fine in a factory situation, but, with the NV4500 and the home made transfer case mount, the cross member is probably sitting back a little which makes the wiggle room a little tight. So, I marked where the exhaust comes closest to the brace, then removed the brace for adjustment...
...in the form of cutting slots with the cut-off wheel...
...beating it mercilessly with my 2-pound ball-peen hammer...
...whammity, wham, wham...
..and welding it back up. It gained me about another 1/2 inch of clearance.

Insulating the cab roof.

Anybody who drives these old crew cabs knows the way the roof acts as a drum. On various internet sites there are frequently debates as to how to deal with this if you are building a diesel truck and you want to be able to carry on normal conversations or listen to the radio. Many people are against filling the space between the ceiling and roof with foam is a mistake just asking for rust issues. I disagree. Year ago I filled the roof of this truck with foam. It has been sitting outside ever since. Before I filled it, I had too repair rust all the way across the top of the windshield. To this day, the rust has not returned and the roof just makes a dull thud sound when you knock on it.

Long story short, I am filling the void in the roof of this new cab. I attached a longer hose to the cans of Great Stuff to reach deeper into the recesses.
I happen to have some hose that fits over the Great Stuff straw perfectly.
Being the brute that I am, I went ahead and bored some holes in the ceiling that are the same size as the rubber plugs that cover the body mount bolt holes in the floor. I plan to make headliner inserts someday to cover them, but I really won't mind if the rubber plugs are visible indefinitely.
When it was all done, between three new holes, the sunvisor holes, and the rear dome light hole, the roof is now full and muted.
Just a little trimming...

The Powerlock

Once again it has been a long time since I put in any updates. Progress is depressingly slow as the bones grind on each other in my low back, but every once in a while I get out there and make a couple of hours progress.

Here is the condition of the friction material in the limited slip. In the process of swapping gears, I put in new clutches.


I thought it was pretty cool looking at how this thing works. I have no pics, but, with the help of M & H machine. The rear end is all buttoned up with 3 inch brakes, working park brake cables, and fresh paint. It is all buttoned-up under the truck with some springs from the cab&chassis. I removed two leaves from each side. Air bags will take up the slack some day.