Thursday, February 28, 2008
Hey sorry for the lack of progress.
Tuesday, February 26, 2008
New problem.
 The last thing I did in the shop was to remove this fuel tank and the arched cross member above it. If I am going to use this large tank in the crew cab, which I an, I will need to transfer over this raised cross member. I beat the top rivets with a cold chisel and medium hammer. I got out the hot wrench for the lower, hard to get to, rivets.
By the way, the donor frame had taken a hard hit on the end of the passenger side rail causing it to diamond or parallelogram, so I cut loose the right sde first, then put a come-a-long on it to pull it back square. I just used a framing square along the left rail to check squareness.
 So, I brought the newly free cross member into the shop and laid it next to the arched one shown in this pic. The holes for the top rivets are perfect, but the bottom holes for the gusset are wrong. This is when I found that the crew cab frame is a full inch deeper than the '92 standard cab donor. I remember this being an issue when I took the 360 out and put the 440 in. I had left the under tranny cross member on, and, since it bolts to the bottom of the frame, it put the tranny too low by an inch. Anyway, this is an imprtant cross member because it is right even with the front spring hangers. I want to get it right. I think I have come up with a way to secure this in with an inch of spacer without compromizing integrity. All this just so I can spend more at the fillin' station.
This thicker frame also pretty much means I do not change over the tranny member that I talked about in my last post for the same reason I was not able to do it ten years ago.
Saturday, February 23, 2008
Another thing.
 The first two pictures show the tranny cross member. The one in the donor truck (right) looks beefier than the old one. It also has a relief in it for the exhaust. Snaking the 4" exhaust past the transfer case is pretty tricky, so I will probably swap this member, too. At least this one bolts in.
 Below and right you can see that the only difference between the under engine member is the slotted motor mount hole on the driver's side. A little work with the grinders will solve this problem.
Not a lot of excitement today.
 Today, I removed the chasis wiring harness, then I rolled the frame outside and pressure washed it. After rolling it back in, I removed the skid plate and started looking at the cross members and comparing them with the wrecked donor truck. The crew cab short-bed frame is about 18 inches longer than the regular cab long-bed of my donor.
 The biggest issue I will run into, as far as the frame goes, on this swap will be the arched cross member shown at the right. The fuel tank goes under this member. The tank that I took out a few days ago was only 20 gallons. The one in the donor, pictured below, is something like 35 gallons. I don't want the little one.
Though the cross members are shaped different and the frame is a 1977 and the donor is a 1992, the mounting holes are exactly the same. The problem here is that they are riveted not bolted. I can torch them out on the junk frame, but I do not want to put that much heat on the crew-cab frame. I will probably drill them, chisel them, or grind them off.

Monday, February 18, 2008
Two days in a row in the shop. A guy could get spoiled.
 Now I have the body blocked up on the frame and back bumper. I just had to pull the six body mount bolts, disconnect the steer shaft, disconnect the gas fill neck and vent, and remove the bolts from the master cylindar to the brake booster. I let the master cylinder stand there and wobble on the brake lines.
 Ignore the sign in the background. Mr. Goodwrench don't work here. It's all MOPAR.
 I should have put the little tires on the front. I don't like lifting this much weight this high.
 Wow, the frame is almost bare. If you look closely you can see a little block on the drivers side of the engine crossmember. That is half of the motor mount. With a broken motor mount and the fact that the tranny mounts were loose, it is no wonder that the fan went into the shroud under hard acceleration. With all thr torque pushing all that weight, I'm lucky the whole engine didn't climb out of the engine compartment.
 Here she sits in the ramcharger engine bay. I guess the ramcharger had a 440 originally. Believe it or not the rear crossmember if in exactly the right spot. That might explain the goofy brake booster. I had clearance trouble in the other truck.
 Snug as a bug in a rug. Is anybody asking why I am putting this 400 horsepower into this little truck?...Because, I can.
Sunday, February 17, 2008
Finally, I get to take the cab off.
 Here I have to set it down and relocate the crane. Every shop should have a beam and hoist in the ceiling.
 Clear of the truck! The shop is really getting crowded with truck parts.
 This should make the engine pull a lot easier. Looks like the cherry picker gets to go back to work again tomorrow.
 My cab mounts were so fried that the bottom of the cab was sitting on the frame. Notice the fresh orange surface rust.
 This next shot is a cab mount bracket. It is a casualty of the wasted cab doughnuts. The rubbers in my back cab mounts were so bad the nut end of the bolt was hanging loose allowing the cab to bounce up and down. I will have to replace these riveted-on brackets.
 In this shot the inside-the-frame gas tank is out. And, my daughter is working on the front shaft of the two piece rear drive line.


Thursday, February 14, 2008
Got 2 more hours in the shop.
 The carpet is not too bad for being in there for 10 years. I haven't yet checked to see if I can even buy new molded carpets for this generation dodge. If someone has a source, feel free to post a comment.
 It's my guess that this carpet and padding has been wet since the day after I put it in. The truck has been in the shop for, what, a month now and it is still wet from where my vents leak. This is some thick pad I put in on the last build for heat and sound. I did not put it up the firewall enough. Boy, it got hot in here in the summer.
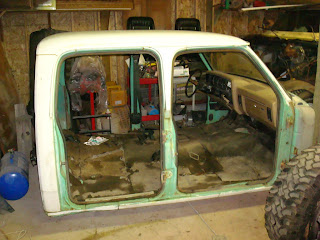
 The cab is pretty much picked clean now. I just need to disconnect the master cylinder and do something with a couple of fuel lines in the back corner and the yellow cab is ready to lift off.
 Today was a good two hours. I found $3.08 in change between the floor and the ash tray.
Monday, February 11, 2008
I only got about an hour and a half in the shop today.

Now the heater box is out. It helps if you remove all the nuts first. You feel kind of stupid after yanking on it for a while, only to find that it was still bolded-in.

Another shot of the nearly empty cab. You can see the paint from my previous build, ten years ago, has held-up. All the metal was that goofy green color like the interior of my new cab and the shot of the back wall behind where the gas tank was. You can see the engine through the hole where the heater box was.

This is what ya call one-a-them artsy shots. Notice the tranfer-case shifter and front seat through the hole.
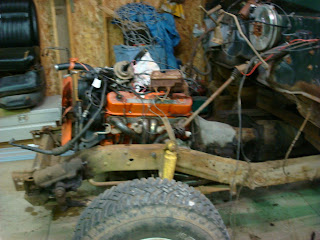
 Every time I post a picture with the hemi-orange engine, I get excited about seeing the Cummins in there. It makes me wonder about how I am going to paint and dress it up. I know that everywhere I take this truck, someone will want to "have a look under the hood."
Saturday, February 9, 2008
Back to work on stripping the old truck.
 Below, I have removed the instrument panel and steering column. I am working carefully and methodically labeling things that are not obvious. All of this dash and wiring are going into the Ramcharger.
Back in the shop today.
 Since I am always working by myself in the shop, I need to devise ways to get big jobs done.
 Man, I love this engine hoist. I've got a chain hoist on a big beam further into the shop, but, because of the yellow cab being in the way, I could not lift the white cab, then roll the truck out from under it.
 I love this shot. Did I mention that I love this crane. Below is the new cab tucked away on its scooter wheels.
 Another shot. I am pleased with how rust free this cab is.
New Cab
 Especially when I found out it has the correct firewall for my heater box and wiring harness, and, to top it all off, it has a clutch pedal which was the one thing missing from the 5-speed replacement kit.
Front axle.
The first problem is a broken inner "C". The king pin was torn frm the yoke on the passenger side.


The next problem is the broken knuckle on the driver's side. I was going to switch over to crossover steering and then go with a high steer set-up. This would eliminate this worry, but the guys that build the high steer stuff don't recommend it for larger tires on pavement. And it is an $800 set-up.


